
Brought to you via HOUZZ–great article about kitchen design for today’s home owner.
Category Archives: Home Remodelling
Glass Shelves- Simple and Beautiful
Below is a guest posting on the subject of glass shelves. Whether inside a lit cabinet, or used to showcase items, glass is a great option for shelving materials to consider
Glass Shelves: Simplicity + Beauty
No matter which room of your house you’re redecorating and how clutter-free you live, you will always need a place to keep your possessions. Even the strictest minimalist requires practical objects at hand on a daily basis. Closets or cabinets are functional, but their overuse can make your rooms look smaller. If you have an empty corner or wall space that you want to utilize more effectively, glass shelves may be the solution.
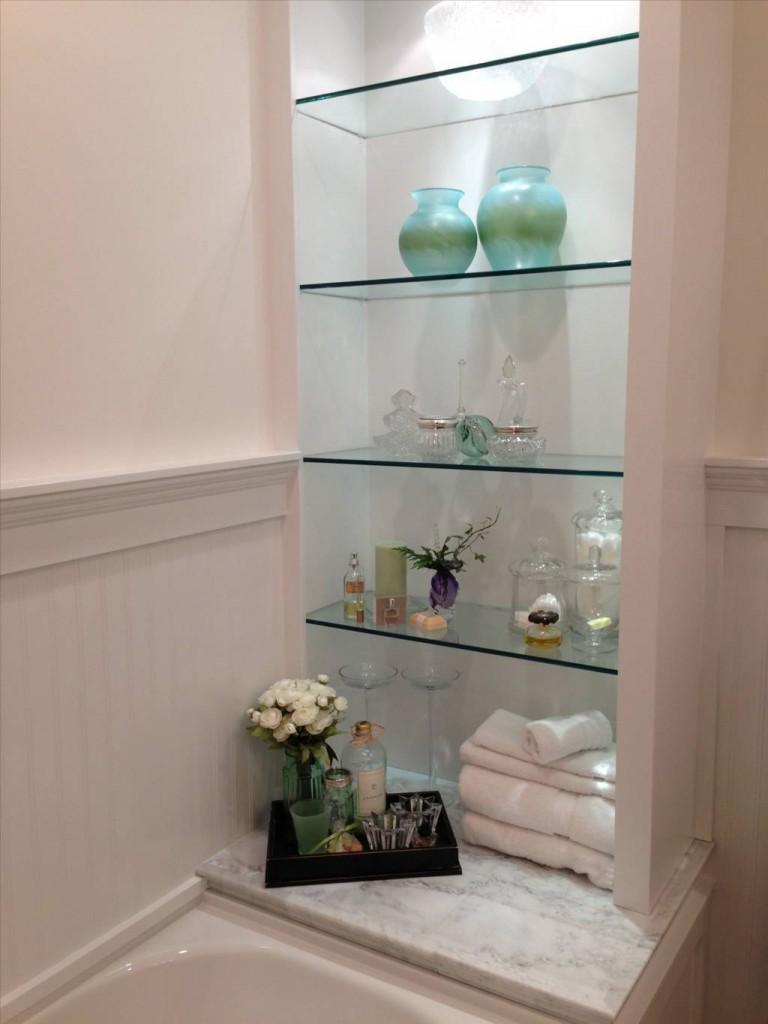
Let’s say you have an all-white or cream-colored bathroom with a large tub for luxurious baths. You want a clean and simple way to organize your bare necessities. Fitting a set of glass shelves in the nook next to the tub will maintain the room’s relaxed, spa-like ambiance, while keeping your toiletries, candles and towels nearby.
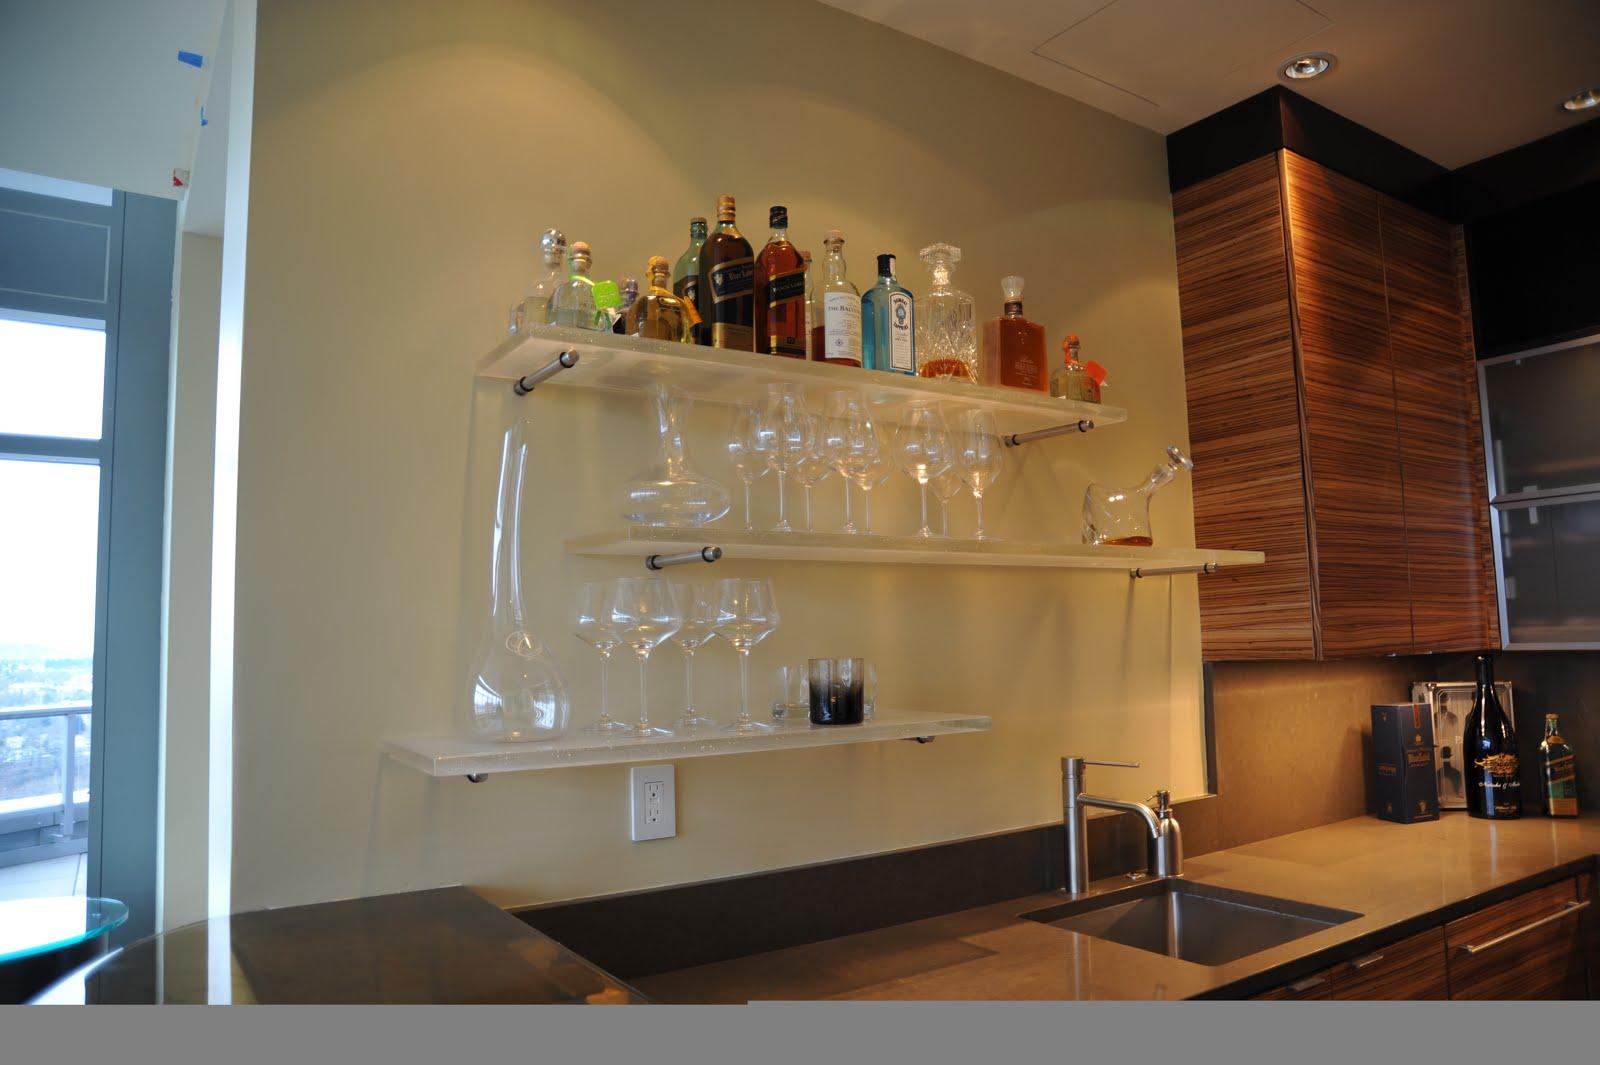
If you’re transforming your living room or basement into a bar, you will probably use wooden cabinetry. To create a contrast to the dark wood, install a few floating glass shelves above the sink. The shelves, as well as the glasses and bottles you display, will sparkle in the light. In this particular example, the thick, frosted shelves match the modern fixtures and feel of the bar. The great thing about glass is that you can customize it, choosing the hue, finish, and width of your shelves.
On the topic of customization, glass shelves can also be fashioned in unexpected shapes and designs. Are you an art lover looking for a unique way to show your collection? Get your sculptures and vases out of the stuffy display case and onto multi-level, zigzagged shelves. The interesting form of the shelves will guarantee that the art is the focal point of the room, starting conversation and spurring compliments from your guests.

As you can see, glass shelves are a simple, beautiful way to add practical storage space to your home. There is an abundance of shelving styles on the market, but don’t limit yourself to the options found in big-box stores. Whether you want etched or smooth, curved or straight, green-tinted or crystal clear glass, have an expert create shelves that match your taste.
About the Author: Glass and Mirror Pros in Orlando is a company with over 30 years of experience in the glass industry. Our dedicated technicians can repair or replace windows, sliding glass doors, and install glass shelves, shower enclosures, and more. We are passionate about interior design and making homes beautiful with glass products. Find us on Facebook for more information and creative ideas!
11 Things to Expect During a Remodel
S Interior Design has been working with clients on a lot of remodel projects lately. Folks are investing in their homes, or moving into new homes that need a bit of updating. Below we share a well written article that high lights some of things to expect when you under take a remodeling project.
11 Things to Expect With Your Remodel
Prepare yourself. Knowing what lies ahead during renovations can save your nerves and smooth the process
By: Anne Higuera CGR, CAPS
If you’ve never remodeled before or are taking on a big project, you may feel a little nervous. How much will it cost? How long will it take? Between the large expense and the excitement of anticipating your finished remodel, it’s hard not to feel a little apprehensive. Knowing what to expect can help allay your fears and make you better prepared for what’s to come.
1. Dust. Even with elaborate ZipWalls, a fine layer of dust can gather in parts of your home far from construction. There are a few ways to control it. If you can, close off the construction area from the rest of your house with a compression-fit temporary wall. Running air filtering systems called air handlers can also pull the dust from the air on the non-construction side of the house. Heat the house without your furnace if possible, or completely block the warm-air and cold-air returns in the construction area. If you don’t, you’ll just be pulling dust from that section of the house into the part where you’re living. Consult an HVAC company before blocking ducts to make sure your furnace will still work effectively.
2. Noise. It will be incessant. Whining saws, scratching Sheetrock sanders and thumping nail guns followed by bellowing compressors: in short, little peace or quiet. Find another place to nap and don’t count on working from home unless your home office is far away from the construction zone. If you’re sure it couldn’t possibly be that bad, visit someone else’s home under construction and you’ll see.
3. Triumphant highs. For you it may be the demolition of the ugly vinyl floors in your kitchen. For others it may be the installation of the carefully selected back splash tile. Others still may feel elated only when they see Sheetrock go in or get to relax when their project is completely done.
4. Multiple sighs. It may be that you just want to be done, or that you’re tired of answering so many questions and writing so many checks. Or you may just be tired of having so many people in your house. Hang in there — remodeling fatigue will be short lived when you get to move back into your newly remodeled space.
5. The unexpected. If you expect anything, expect this. Asbestos, irregular framing, jerry-rigged wiring, funny plumbing and more unexpected surprises are bound to arise. No, you won’t be laughing, and neither will your contractor. Count on finding something no one could have anticipated in your budget and your time frame, and you will be well prepared when it happens.
6. Change orders. The unexpected’s cousin is the change order, by which any new and changed work is documented, along with added or reduced cost. Change orders can also be used to resolve allowances, which are placeholders in the budget for particular items. But most often change orders occur because of things that clients decide to add or change. When you absolutely positively have to have that Italian tile, you can bet a change order is on the way.
7. Cash concerns. Even if your project is right on budget, the sheer amount of money you are spending may cause a bit of a freakout. If you’re used to writing four-digit checks, you can easily be writing checks with one or two more zeros during a large remodel. If costs are increasing, along with change orders, it could increase your anxiety. Having cash on hand that’s a bare minimum of 10 percent above contract for contingencies will help alleviate that stress. Have 20 percent if you want to worry less.
8. Delays. Snow falls, people get sick, cars break down and sometimes faucets ordered from the factory take 10 weeks instead of six. You and your contractor will likely be working from a schedule that assumes the world is a perfect place. It’s not, and knowing that will allow you to be resilient when your schedule shifts a bit.
9. Decisions. Where should that outlet be? How high do you want the shower head? Where do you want the cabinet hardware mounted? Oil-rubbed bronze or chrome or brushed nickel or satin nickel? Is your head spinning yet? Count on hundreds of questions that you’ll need to answer as your project proceeds, or select your architect (OR DESIGNER!) as your proxy. Just know that your selection of a contractor is the first of many you will make.
10. Outliers. At the end of your project, expect one or two punch-list items that will take longer to resolve than anything else. It may be a light fixture that arrives broken or the very last two pieces of tile. The important thing is to get the final details right, even if they take a little longer.
11. A party! Expect that you will want to show off your newly remodeled kitchen, living room or addition. We have had clients throw parties and invite friends, along with us and our trade partners. It’s gratifying for everyone to see a beautifully finished home filled with people enjoying themselves.
Tell us: What have you learned from your latest remodel?
Home Design That Welcomes The Outdoors IN!
Finally the weather is turning a bit more pleasant. Spring has sprung in much of the country (or will soon……). S Interior Design is based in Arizona and it is definitely time to enjoy the outdoors before the triple digit temperature arrives. Below is a guest post about a home renovation in Australia that fully recognizes the opportunity to meld the outdoors with the interior spaces. Quite beautiful!
Clayfield renovation (Bayview) – Bringing the outdoors in
Brisbane is blessed with a gorgeous sub-tropical climate that lends itself to an outdoor lifestyle, and the suburb of Clayfield is a perfect example of this desire to spend time connected to nature. So it’s not surprising that the owners of this pre-1946 Californian Bungalow requested that Dion Seminara Architecture create for them a home that would fully take advantage of the predominantly fine weather.
The renovation involved an addition to the rear of the existing home which consisted of a dining space and a stunning new kitchen. A deck and courtyard were built at the rear of the home with sliding doors from the kitchen/dining room opening the home up onto this area. The result of this is immediately noticeable as the transition from inside to outside is seamless, resulting in a feeling of freedom and a connection when entertain in the courtyard area.

On those days that are less than ideal due to rain or the occasional cold change, the interior of the home can be closed off creating an intimate space that is warm and comforting.

At the front of the property a new double car port blends into the existing home, with a remote-controlled gate sealing off this area from the street. A new gate and gatehouse added to what already was an appealing streetscape and the re-landscaped front yard now takes on the appearance of a pleasant little courtyard itself.
Inside the little used main bedroom and hallway were originally the main beneficiaries of the prevailing north-east breezes that cross the property. Given that not much time was spent in these spaces they were renovated to create a gorgeous, naturally ventilated new living area that features an abundance of natural light. Creating a truly inviting space that thanks to the air-flow and natural illumination, further enhances the feeling of connection with the great Australian outdoors.


For more information on this property visit:
http://www.dsarchitecture.com.au/architects/clayfield-home-renovation/
Mix Your Design Styles
Below is a guest post on the subject of mixing modern and vintage decor style. S Interior Design is a big fan of mixing design styles within a home. By mixing styles of decor you create a unique environment that is a true reflection of your personal style preferences. So mix away, use Grandma’s antiques with a modern Knoll chair without fear.
How to Mix Modern and Vintage Decor Style
You love the look of modern decor in your home, but you just can’t toss out all those vintage pieces that you’ve collected over the years. Instead of choosing one of these over the other, why not choose them both? It’s absolutely possible to blend these two styles together to create a home that feels unique, special and welcoming. All it takes is a little bit of creativity, some time spent experimenting with decor placement and some great pieces that you love.
Tips for Blending Decor Styles
1. Avoid Perfection
No longer do homes have to have the “perfect” decorations that are straight from the showroom. Don’t be scared to let your personality show by putting unique pieces of decor throughout it. This could be a chest that you picked up while traveling in Spain or a modern number wall clock you found online. When people walk into the room, they should want to explore all the different things that are there. Not only will this make the room more interesting, it will also give you a lot of conversation pieces.
Tip: While your decor doesn’t have to be perfect, you should avoid having a lot of clutter that makes your space look messy.
 Source: http://www.thrivevintage.com
2. Decorate Your Chairs
Don’t leave your couches or chairs bare. These are the best spots to add modern or unique pillows or throw blankets. For example, if you have replica furniture from a modern designer, then put on some pillows with pillowcases made with Victorian prints or old throw blankets you picked up from an antique shop. Mixing and matching these two things together will balance out the harshness of the modern design with the warmth and richness of the vintage design.
Tip: Make your own pillow by going to a fabric shop and choosing rich fabrics that look like they are from different time periods.
Image:  Source: http://designpardeux.com
3. Transform Your Furniture
If you have vintage or old pieces of furniture that you don’t mind changing permanently, then re-upholster them with modern fabrics. If you do this then you will be left with unique pieces of furniture that nobody else has! The best part is that they will mix the design of the antique furniture with the boldness of the modern fabric.

Source: http://www.modern-fabrics.com
Tip: Paint the chair if it doesn’t match the colors that are in the fabric to make sure that it’s a statement piece in the room.
4. Change the Curtains
If you have an uneven balance of modern and vintage, then change out something like the curtains. Right away it’ll make a big difference with the way your room looks, and will balance everything out quite well. And, if you get a colorful curtain, it will really brighten your room up and add a pop of color that makes it more interesting!

5. Add Small Touches
Curved mirrors, new knobs on drawers and wallpaper are all small touches that can make a big impact in the overall appearance of your room. These are also the small touches that give the room more personality and showed that you put a lot of thought and effort into the details!
 Source: http://smallshopstudio.com/2013/11/25/trad-eclectic-barcelona-designer-home/
Finishes For Your Bathroom Walls
Below is a guest post on the topic of what to do with your bathroom walls. Of course consideration needs to be made to the moisture rich environment, who the primary users are, and what your preferred design style is. Paint in the proper finish, wall covering, wainscoting, panels, and tile are all options to consider. We just remodeled a small powder room at our house and placed two different tiles that go up the wall to a height of 42″. It adds a sense of drama in a very small space and functionally as there are no worries if someone gets messy with water.
Choosing The Right Finish For Your Bathroom Walls

If you are considering remodeling your bathroom, you will need to think about the finish you will use on your walls. Choosing the right finish for your bathroom is very important because a bathroom has its own special considerations, and the wrong decision can cost a lot of money to redo. Here I have outlined some finishes you could apply to your bathroom walls. I have also noted some pros and cons to help you decide which is the best choice for you.
Paint

Paint is the basic finish for any wall, and has its own pros and cons in your bathroom. On the plus side, paint is available in a massive range of colours, and if you cannot find one to suit you then you need to look harder. Paints are available that are waterproof and cleanable, so maintenance is relatively easy, and application is a simple thing that you may be able to do yourself. Against it though is that it can appear a boring finish that will start to look tatty within a relatively short time.
Wallpaper

You can buy wallpaper that will suit hanging in a bathroom, and you can add a touch of personality to a room with your choice. The less expensive papers are not as long-lasting as the more expensive examples, but will last a year or two before wear and tear takes its toll (after all this is paper we are talking about …coated or not). Paper hanging in a bathroom is best done by a professional as the steam it will encounter demands good application.
Wood

Adding wood to a bathroom wall is less in vogue now, but it can still look extremely stylish if a good job is done. Quality sealing is essential though as otherwise you could have rotten or fungi riddled wood on your walls in no time. This is quite an expensive finish to use as you have to buy and fit the wood, and then it needs sealing and maintenance. Overall I would not use wood simply because once bored with it you need to have it removed before starting again.
Tiles

Tiles are the perfect choice for a bathroom as they are impervious to water and easily cleaned, they are also available in a larger and larger selection of colours and patterns, as well as finishes. For a more expensive look you can add highlight tiles, or even a feature wall. It is true that some tiles can be expensive to buy, but the mass market ensures a great choice of reasonably priced tiles is always available. You will need the tiles fitted professionally to make sure you have no trouble in the future, and that you have the best overall effect from their application. From classic white to slate, tiles look beautiful in any bathroom.
It is easy to see my preference for the bathroom, and it has been my preference for many years now. If I was on a tight budget I would probably choose paint because it is also easy to clean and not bothered too much by water (as long as it is bathroom paint and has anti-fungicide added). However, I find paint too boring, whereas I think tiles add to any bathroom.
Author Bio:
Leslie Kramer, the author of this article, works as a customer support executive at Cerdomus Tile Studio, specialists in high-quality floor tiles. Leslie loves bird watching and visits various national parks on weekends.
Downsizing? Small Works !
I have heard myself saying to several different new clients within the past 6 months-“Small can be great!” As one example, you can probably afford the very expensive back splash tile if you are using it in a smaller sized kitchen or bath remodel; and you need less furniture to furnish a smaller great room.
That said, there are tried and true tips that can give you a larger feeling space—mirrors, lighting, clutter control to name 3 top ones. A guest post about how to make small spaces feel larger is shown below. The author is from the U.K where overall spaces tend to be smaller than in the United States where the mantra seems to be-bigger is better.
How To Make A Small Living Space Feel Bigger
Whatever your current living situation, if your house, apartment or shared accommodation isn’t quite as palatial as you’d like it to be there are lots of different ways to adapt your space to make it feel bigger.
It is possible to transform the rooms you occupy at home with a few simple tricks of the eye, making them appear lighter, airier and much more spacious. Here are some ways to decorate and organise your home to give the impression of much more space than you might have.
Use Of Mirrors
Whether you place them above the mantelpiece, incorporate them into your wardrobe door or even prop them up against the wall, mirrors can dramatically alter your perception of a room and also help to reflect light, giving a greater sense of space. Entire mirrored walls are often used in bars and restaurants to make them seem twice the size they actually are, so why not emulate this at home?

(Image credit: Sam Agnew)
For maximum effect:
- opt for large mirrors
- position them opposite windows or doorways where light enters
- don’t be afraid to have more than one in the room- in fact, the more mirrors the brighter the room!
Pick A Light, Bright Colour Scheme
Dark colours, if on every wall, can have the undesired effect of making small rooms appear even smaller. To maximise every inch of available space, choose from a light colour palette of neutrals and pastels.
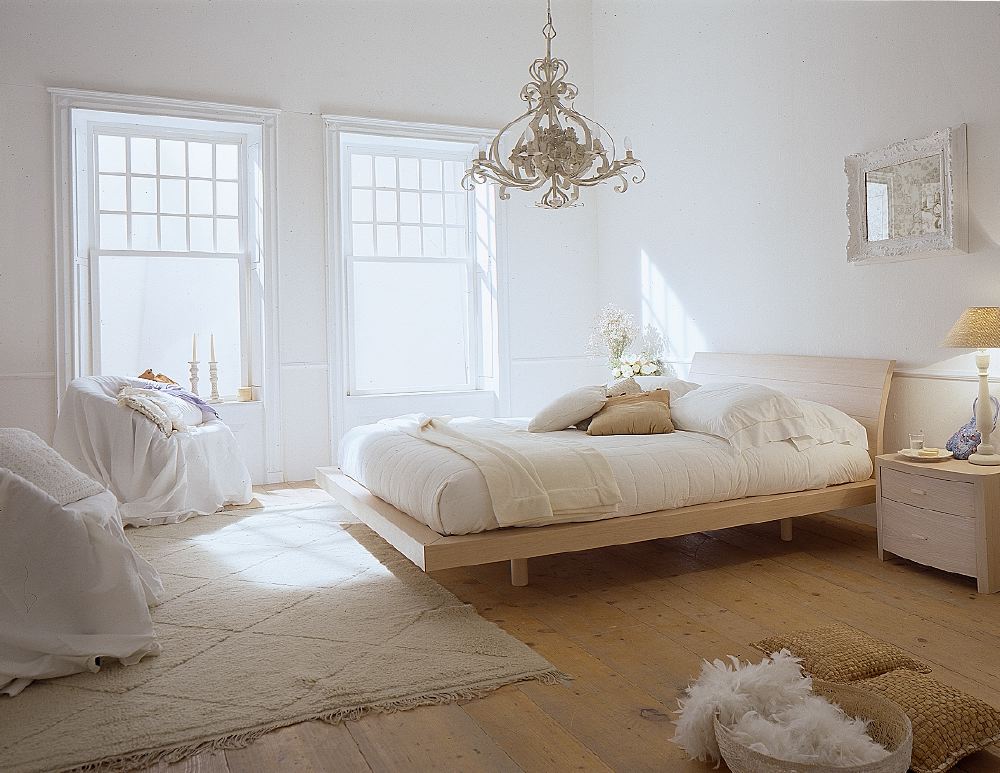
(Image credit: Mazzali)
There is no need to forgo the dark, bold colours that you love, as these can still look great and add character if used in small doses. Perhaps have a feature wall painted in your accent colour and pick soft furnishings to match.
Choose A Light Floor Colour
Choosing anything other than a light floor colour is certain to highlight the small size of a room by drawing the eye downwards to the exact dimensions of the floor space. Opting for a neutral colour which flows uninterrupted up to walls of a similar colour will open up the space and draw the eye up and out to the rest of the room.
Size Does Matter
Unlike mirrors, which can be as big as you like (in fact the bigger the better!), overly large paintings, ornaments, rugs and pieces of furniture dominate small spaces and serve to highlight the size of a small room. Opt for chairs and tables which aren’t too chunky, those with a lighter ‘footprint’ will take up less floor space.
The size of furniture and decorative items should be in keeping with the size of the room, so buy for the space you have rather than the space you’d like to have!
Hide The Clutter With Clever Storage
Cramming lots of paintings, pictures and ornaments into a small room will only serve to highlight how cramped everything looks. To maintain a calm, unfussy environment keep surfaces as clear as possible by storing all non-decorative items away.
(Image credit: PoshSurfside.com)
Built in storage will aid in de-cluttering and saving space. Think about incorporating:
- cabinets built in to alcoves
- wardrobes built along walls
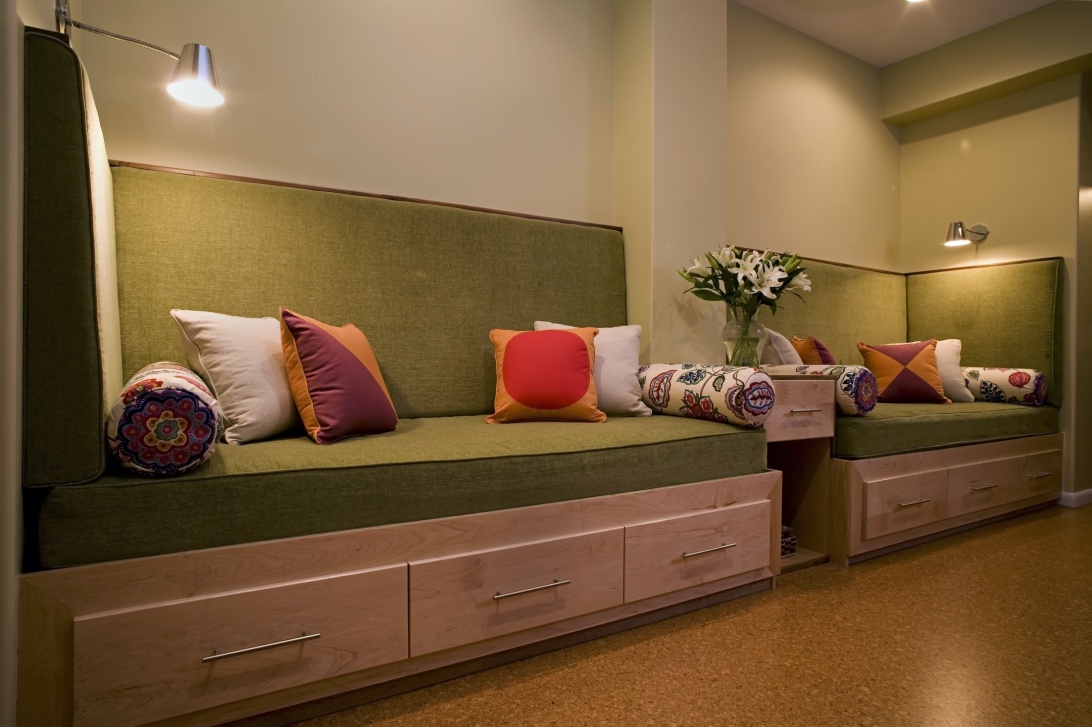
- bench seating which contains drawers and storage space
Let There Be Light
Clever lighting can create the illusion of more space by making the most of every square foot available. If you don’t have large or south facing windows then create light with strategically placed lamps and mirrors. One large central light creates a clinical look which leaves corners and other nooks and crannies in shadow. Light such areas with up-lights, spotlights or lamps.
(Image credit: Doug)
Make use of other reflective materials, such as glass and metals, to increase light. Why not place lamps upon mirrored trays for maximum light reflection, for example?
Knock through to create an open plan living space
If the structure of your house is such that you occupy a series of small box rooms, the simplest way to transform it into a living space which feels much larger is to knock through adjoining walls.

(Image credit: Jeremy Levine)
An open plan living space increases space, adds light and unites the social spaces in your home. Being able to see how large your floor plan actually is and move around it with ease is one of the best ways to make a small space feel larger.
Adopting a less is more approach when it comes to decoration and aiming to maximise available light with neutral colours and reflective surfaces are the best ways to make small rooms appear larger.
About The Author
Hi there, my name is Loren, I love being creative with living spaces. I live in a small but very cosy apartment, I love my creature comforts and I don’t like clutter! I work at Sofasofa.co.uk, who sell comfy sofas, sofa beds and other bits and bobs.
Purple Purple Everywhere
When S Interior Design begins a new project, we have our clients fill out a Client Profile. Of the many questions we ask, we ask about favorite colors. A trend we have definitely noticed is the number of people indicating they really like the color purple.
Historically the color purple has been associated with royalty. Specifically it was the color choice for the robes of the Roman emperors and royalty over the ages. From deep jewel tone purple to dusty plums and lilac, purple can enter into a design scheme in many ways. Depending on how it is used , purple tones can lend a sense of grandeur to a space or a whimsical touch. A good complimentary color to purple is green, and a cream or even white will balance a purple tone well.
Bedding

Flooring

And of course accessories

|


![]()
Choosing a shower screen in a bathroom renovation

You might think that choosing a shower screen is not the most enjoyable part of your home renovation, but if that’s the case you just haven’t been looking at the right shower screens. When I did my recent renovation, the most beautiful ones I found were from Frameless Impressions. Frameless shower screens have a very understated and modern look, they’re elegant and they give the impression of enlarging the space of your bathroom rather than cutting it off and compartmentalising it. This is a display image of the screen I ended up having installed.
I loved the idea of it as well as the look of it, because frameless screens are very easy to clean to clean and maintain. Unlike curtains, they don’t mould or rust, and the outward swinging door protects the rest of the bathroom from splashing. I love the way the glass lets the light from the window in and illuminates the white bathroom and tiles. It gives a real feeling of calm and luxury even though in reality the bathroom is a very small space. Here is another image.

Choose a screen that is the right size and shape for your bathroom. Not all screens have to have doors. Take the one above for example. You want your screen to fit perfectly in with the feel of your bathroom, it doesn’t have to be fancy, just functional and elegant. I was surprised also to find that they don’t have to be expensive. Choose one that you’ll be able to live with for years to come.
